Installing ImagineAPI
If this looks like a lot of work, we do all this for you and more on our Cloud Plans (opens in a new tab).
Installation Steps
Clone The Github Repo
Inside a terminal or shell window, clone https://github.com/imagineapi/imagineapi (opens in a new tab):
git clone git@github.com:imagineapi/imagineapi.gitYou should see docker-compose.yml and .shared.env-example:
$ ls -la
total 48
drwxrwxr-x 8 ubuntu ubuntu 4096 Apr 12 05:28 .
drwxr-x--- 5 ubuntu ubuntu 4096 Apr 12 05:28 ..
drwxrwxr-x 8 ubuntu ubuntu 4096 Apr 12 05:28 .git
-rw-rw-r-- 1 ubuntu ubuntu  269 Apr 12 05:28 .gitignore
-rw-rw-r-- 1 ubuntu ubuntu 1022 Apr 12 05:28 .shared.env-example
-rw-rw-r-- 1 ubuntu ubuntu  447 Apr 12 05:28 README.md
drwxrwxr-x 2 ubuntu ubuntu 4096 Apr 12 05:28 api
drwxrwxr-x 2 ubuntu ubuntu 4096 Apr 12 05:28 bin
drwxrwxr-x 2 ubuntu ubuntu 4096 Apr 12 05:28 bot
-rw-rw-r-- 1 ubuntu ubuntu 2310 Apr 12 05:28 docker-compose.yml
drwxrwxr-x 2 ubuntu ubuntu 4096 Apr 12 05:28 postgres
drwxrwxr-x 2 ubuntu ubuntu 4096 Apr 12 05:28 rabbitmq
Update .shared.env
Copy .shared.env-example into .shared.env:
cp .shared.env-example .shared.envEdit .shared.env:
Some of these values are duplicated so make sure you're careful. Obviously keep these a secret.
Values explained
- These two are the same and you can enter a random string.
API_TOKEN=Enter a random string (8-20 characters)
BOT_TOKEN=same as API_TOKEN- This is an API key for 2captcha (opens in a new tab):
TWO_CAPTCHA_API_KEY=api key to two captcha serviceDISCORD_EMAILandDISCORD_PASSWORDare your Discord user name and passwordDISCORD_SERVER_IDis the server you created in the discord stepDISCORD_BOT_TOKENis the token from the discord bot creation step
DISCORD_EMAIL=your discord email
DISCORD_PASSWORD=your discord password
DISCORD_SERVER_ID=your discord server id
DISCORD_BOT_TOKEN=your discord bot token which you have added to the server above- These can be set to a username and password for RabbitMQ. You have to repeat the username and password.
RABBITMQ_USER=set a username for rabbitmq
RABBITMQ_DEFAULT_USER=same as above
RABBITMQ_PASSWORD=set a password for rabbitmq
RABBITMQ_DEFAULT_PASS=same as above- This the username and password you will use to log into ImagineAPI
STANDARD_USER_EMAIL=email you will use to log into ImagineAPI.dev user interface
STANDARD_USER_PASSWORD=password for the same- Your database password:
DB_PASSWORD=Set a password for your database
POSTGRES_PASSWORD=same as above- A couple random values. Don't make them the same:
KEY=Set a random UUID string
SECRET=Set a random UUID string (it should be different from KEY)- This is the URL you will have to use for ImagineAPI.dev in the
GET,POSTrequests. By default, the port is8055however you can forward traffic to this port and setPUBLIC_URLto that:
PUBLIC_URL=ImagineAPI.dev url or the URL to your server. Example: http://mj.yellow-lemon.ts.net:8055- This is optional. You can forward logs to logtail.com (opens in a new tab) in can be handy to view logs easily and troubleshoot.
# optional
# LOGTAIL_SOURCE_TOKEN=This is optional if you want logs sent to logtail.com, set your source token here and uncomment it
Example .shared.env
Here's a completed example (dummy values):
API_TOKEN=70e55d52-ab08-4f9b-ac0d-8c14bf432b9f
BOT_TOKEN=70e55d52-ab08-4f9b-ac0d-8c14bf432b9f

TWO_CAPTCHA_API_KEY=42341e63a823ae375e6bef411db7ce85

DISCORD_EMAIL=gezim@example.com
DISCORD_PASSWORD=ITabeNtIOlEYBOyCLo
DISCORD_SERVER_ID=1095178629845312359
DISCORD_BOT_TOKEN=MTA19ds19DsFNDU0NjAwOTE4OQ.8Gc180.3J_RZ9NcXZqikZbmvcjlD6QdOzZL6SU3KnLTuIY

RABBITMQ_USER=imagineapi
RABBITMQ_DEFAULT_USER=imagineapi
RABBITMQ_PASSWORD=yAwNstAvIShanZIanc
RABBITMQ_DEFAULT_PASS=yAwNstAvIShanZIanc

STANDARD_USER_EMAIL=gezim@example.com
STANDARD_USER_PASSWORD=nudleaLosiTeRhYdre

DB_PASSWORD=DALboDIoNtatcHAwat
POSTGRES_PASSWORD=DALboDIoNtatcHAwat

KEY=912a2095-bf1a-4acc-819a-5feeaa7320ae
SECRET=223a2843-1d38-4ca1-9e9c-7ae7fb5eb18c

PUBLIC_URL=https://mj.yellow-lemon.ts.net:8055

# optional
# LOGTAIL_SOURCE_TOKEN=This is optional if you want logs sent to logtail.com, set your source token here and uncomment it
Run docker compose
Once you've entered the values in .shared.env, we run docker compose up -d.
This will download Docker images and start the required containers:
$ docker compose up -d
Creating network "imagineapi_default" with the default driver
Creating volume "imagineapi_api" with default driver
Creating volume "imagineapi_rabbitmq" with default driver
Creating volume "imagineapi_database" with default driver
Pulling database (imagineapi/imagineapi-postgres:0.2)...
0.2: Pulling from imagineapi/imagineapi-postgres
f1f26f570256: Pull complete
1c04f8741265: Pull complete
dffc353b86eb: Pull complete
18c4a9e6c414: Pull complete
81f47e7b3852: Pull complete
5e26c947960d: Pull complete
a2c3dc85e8c3: Pull complete
17df73636f01: Pull complete
713535cdf17c: Extracting [===============>                                   ]  28.97MB/92.23MB
52278a39eea2: Download complete
4ded87da67f6: Download complete
05fae4678312: Download complete
56b4f4aeea2d: Download complete
You can see the status of the containers with docker compose ps:
$ docker compose ps
        Name                       Command                  State                                  Ports
------------------------------------------------------------------------------------------------------------------------------------
api                     docker-entrypoint.sh /bin/ ...   Up             0.0.0.0:8055->8055/tcp,:::8055->8055/tcp
autoheal                /docker-entrypoint autoheal      Up (healthy)
bot                     node dist/consumer.js            Up (healthy)
database                docker-entrypoint.sh postgres    Up             5432/tcp
imagineapi_rabbitmq_1   docker-entrypoint.sh rabbi ...   Up (healthy)   15671/tcp, 0.0.0.0:15672->15672/tcp,:::15672->15672/tcp,
                                                                        25672/tcp, 4369/tcp, 5671/tcp, 5672/tcp
Monitor Bot Status:
It should take a few minutes for all the services to become healthy. Once they do you can log into the API using the PUBLIC_URL you set in .shared.env:
In our example on AWS EC2 with port 8055 open, it's: http://ec2-28-226-218-224.compute-1.amazonaws.com:8055 (note it's just http)
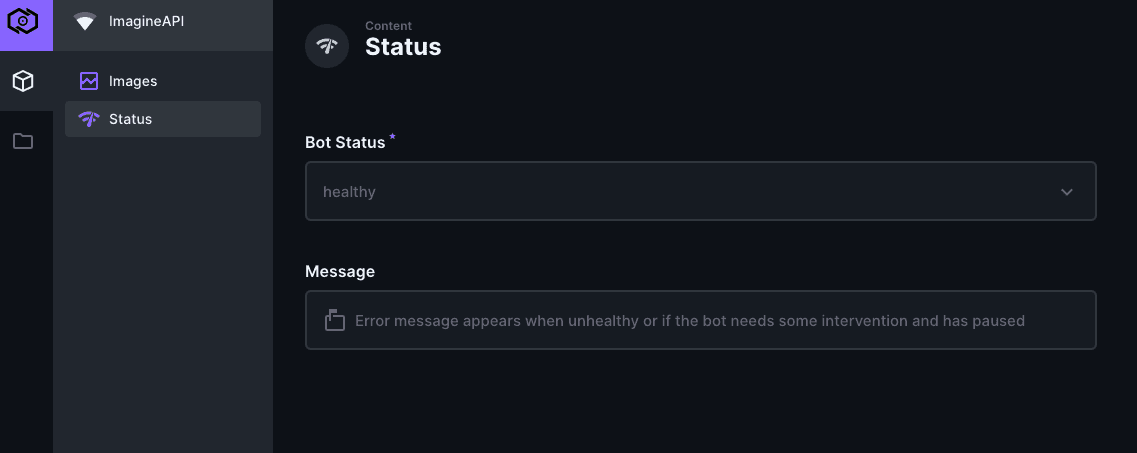
Then you can click on Status:
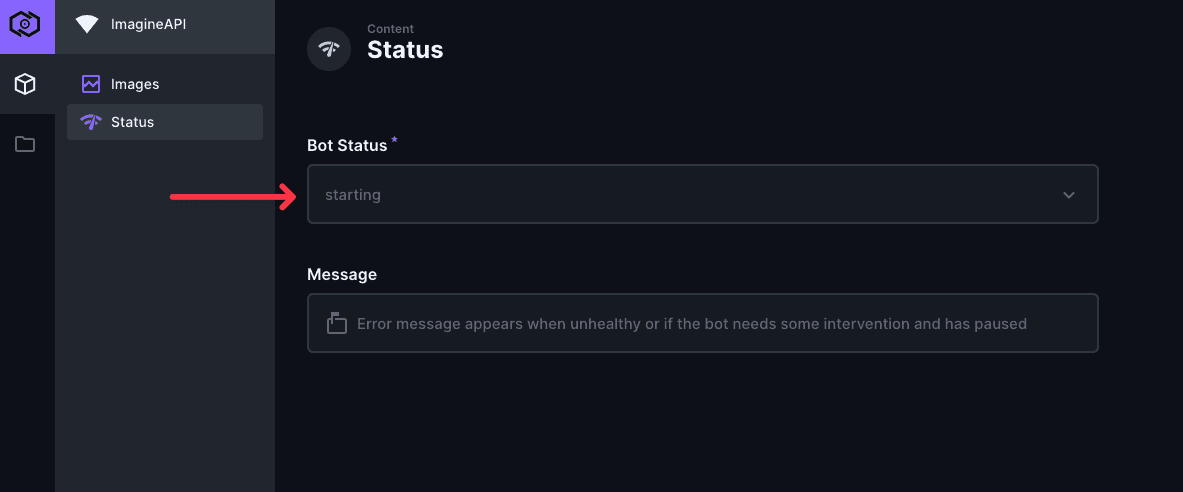
Verify Discord Login Link
After a while, the bot will go into Paused mode (keep refreshing to see updates):
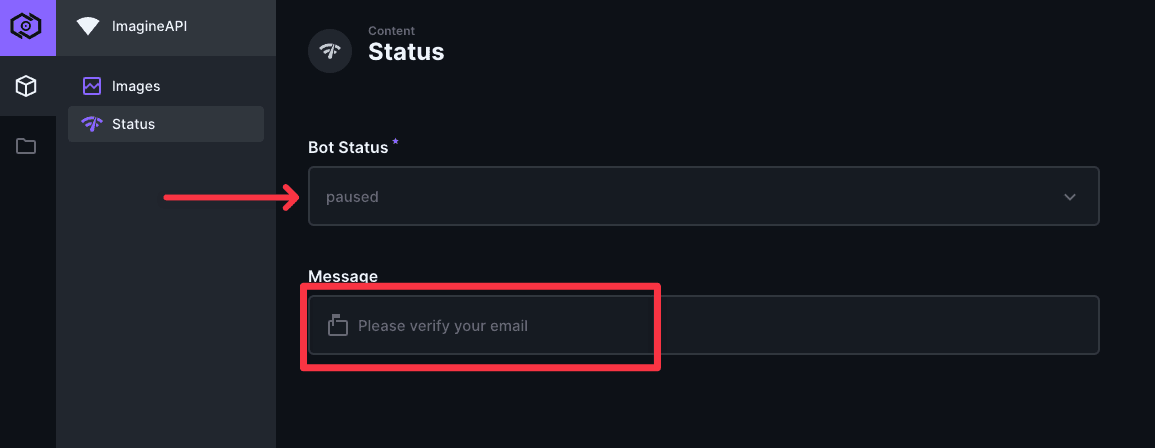
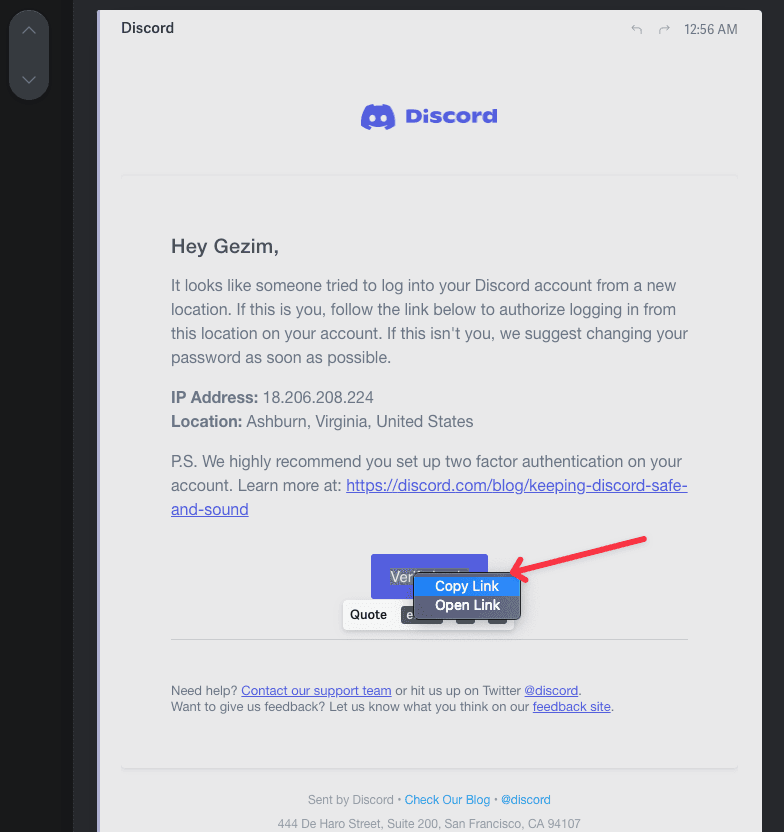
At this point you will receive Discord email with a login link.
Send email link to RabbitMQ
You will need to navigate to port 15672 for your server (make sure it's open). In our example: http://ec2-28-226-218-224.compute-1.amazonaws.com:15672 (note it's http):
You will see the RabbitMQ login screen:
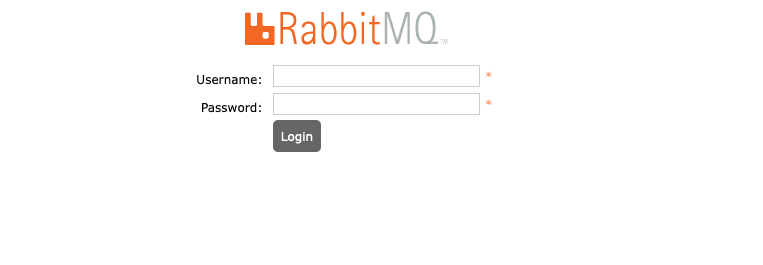
Login with the RabbitMQ username and password you set in .shared.env.
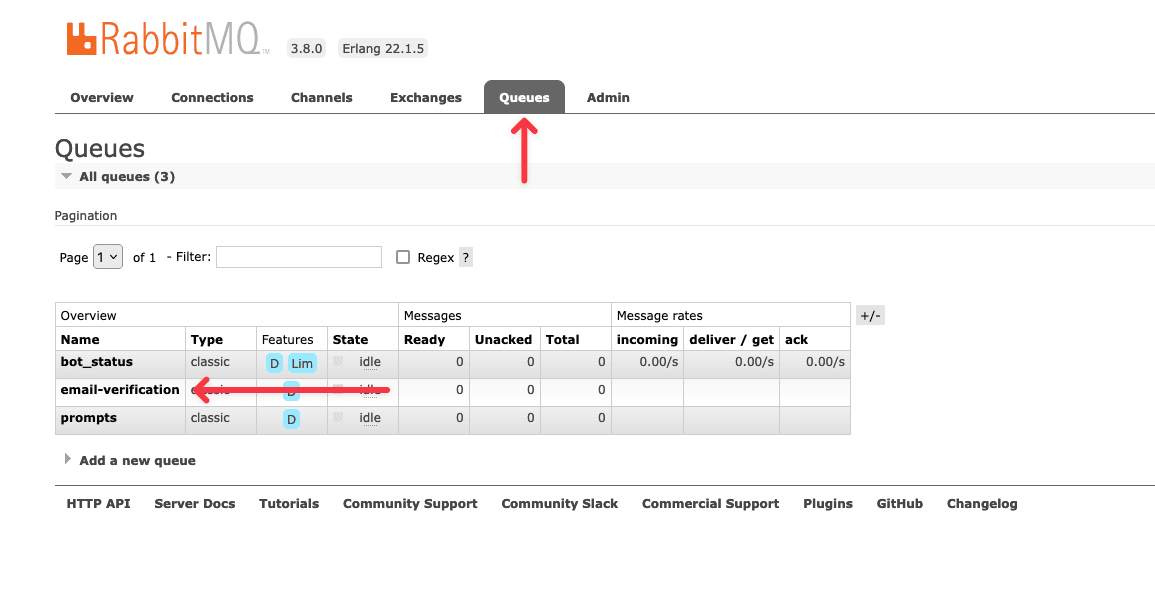
The click Queues and verify-email queue:
Now, copy your email link (DO NOT CLICK THE LINK):
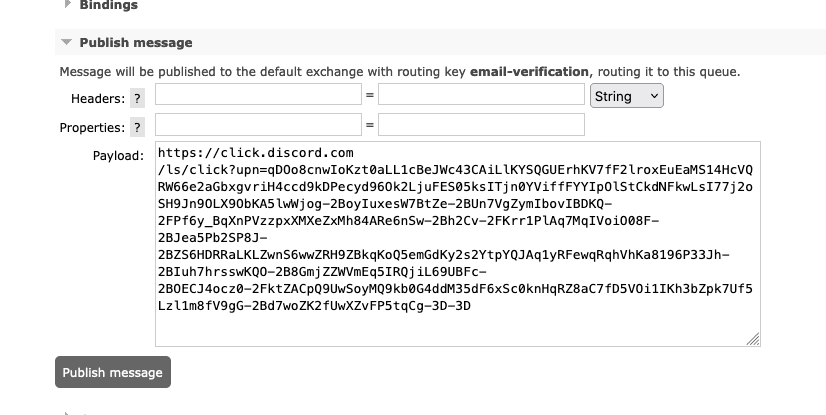
And paste it into a message in RabbitMQ and click Publish:
Shortly, you should see the bot status become healthy again:
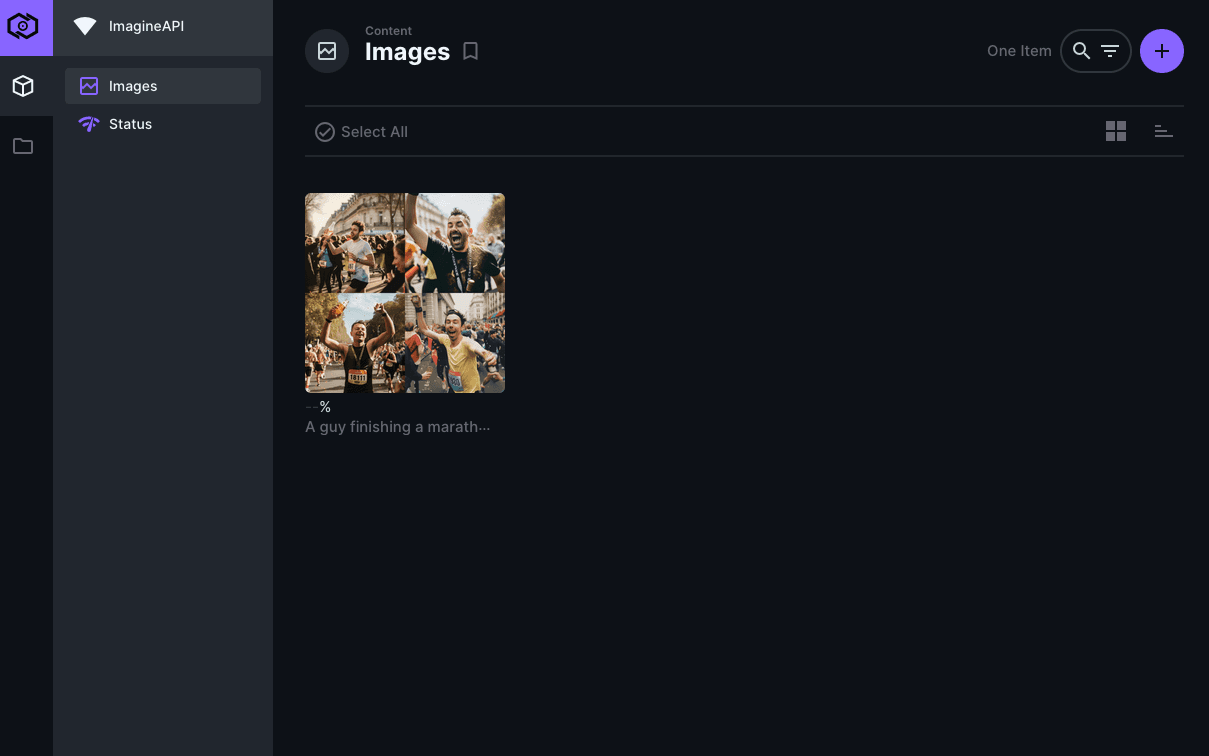
Generate your first image 🎉
Create a new image using a prompt:
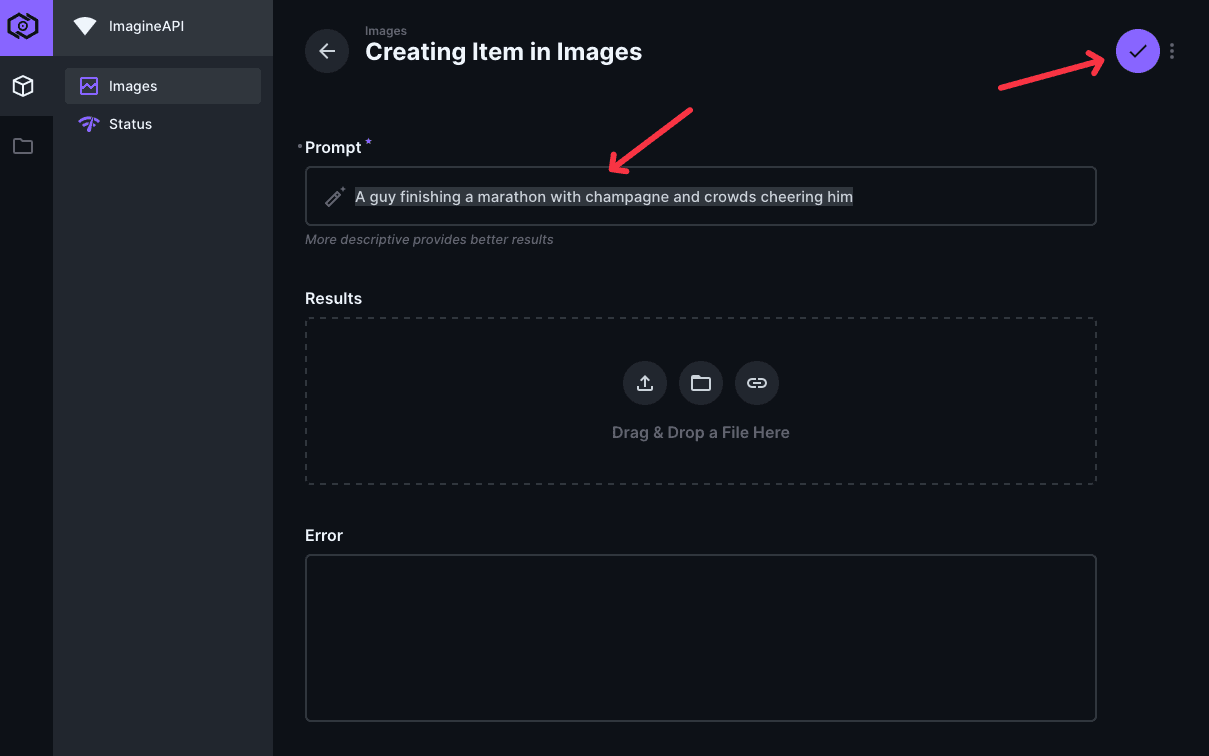
After around 30 seconds you'll see the results (might need to refresh the page):